
Part of the thrill for me when scrapbooking & papercrafting, is to see just how far I can make my supplies stretch and still have a beautiful end result. I have embraced the motto ‘reduce.reuse.recycle’ to the fullest.
So, what do I do to create texture and dimension on my projects, without breaking the bank?
Today, I want to show one very simple way to add amazing texture to a background and I’m quite certain you have everything you need right at your fingertips!
Supplies:
- Various-Sized Leftover Alphabet Sticker (or Numeric)
- Chipboard the Size of your Finished Project
- Acrylic Paint
- Foam Makeup Wedge or Foam Paintbrush
 Gather all of your leftover alphabet stickers and sort them by size (small, medium, large).
 Start applying random alphabet/numeric stickers in the center of your chipboard, starting with the largest alphabet stickers you have.
 Continue applying random alphabet/numeric stickers, filling in the smaller spaces in between with your smaller sized stickers. Don’t worry about trying to coordinate colors next to one another.
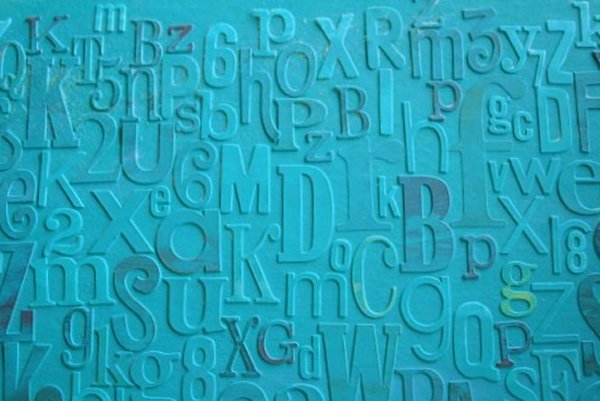
 Your completely covered background will look something like this.
 Now, we’re going to make it usable as a background paper by applying paint. Add three or four small puddles of paint in random places on your alphabet stickers.
 Using a foam make-up wedge or a foam paintbrush spread the puddles of paint evenly across the surface of the sticker-covered chipboard piece.
 Depending on the look you are going for, will depend on how many times you will repeat this process. If you want full coverage, I suggest letting the first coat dry for an hour and then repeat with a second coat. I prefer for small amounts of color from the stickers to peek through, so I only use one coat. I think it adds even more depth to the background.
 Once your background is dry, it’s time to put it to use! I chose to make it the background for a framed art piece to hang in my daughter’s room.
And that’s it—an extremely economical way to add texture to your products using the leftover supplies you have right at your fingertips!
AWESOME, tania!!
ReplyDeletewhat an incredible work of art for emma. i LOVE this!! :D
¡Me encanta el resultado! Es una idea fantástica.
ReplyDeleteGracias por compartirla.
Saludos.
Great idea! It's frustrating to have so many letters that you won't use... Thanks for sharing :)
ReplyDeleteThanks for sharing---what a great way to use up some leftover alphas--I just can't bring myself to throw them out--now I've got a great way to put them to good use!
ReplyDeleteWow! The end result is amazing!
ReplyDeletewow!!!! This is just wow!!!!
ReplyDeleteNot only a great way to texturize - but what a fabulous way to put to use those odds and ends of alphabet stickers. Thank you!
ReplyDelete